
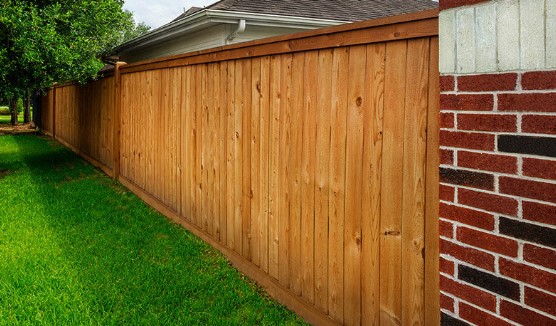
Installing a wood fence yourself can be a rewarding project that not only enhances your property’s curb appeal but also provides privacy and security. While hiring a professional can be costly, a do-it-yourself approach can save money and allow you to customize the design to suit your needs. With the right tools, materials, and guidance, even a beginner can successfully complete the task. This step-by-step guide will walk you through the process from preparation to final touches.
Step 1: Plan and Prepare
Before you begin building your wood fence, you need a clear plan. Start by deciding the fence’s purpose—whether it’s for privacy, decoration, or containing pets. This will determine the height, style, and type of wood you should choose.
Next, measure the length of the area where you plan to install the fence. Use these measurements to calculate how many posts, panels, and rails you’ll need. Check with your local building authority to understand zoning laws, required permits, and property line regulations. You don’t want to build on your neighbor’s land by mistake.
Also, call your utility company to mark underground lines. This step prevents dangerous accidents when digging post holes.
Step 2: Gather Materials and Tools
Having the right materials and tools will make your project smoother. Common materials for a wood fence include:
- Pressure-treated wood or cedar boards
- Fence posts (usually 4×4 inches)
- Rails and pickets
- Galvanized nails or screws
- Concrete mix
Tools you’ll need:
- Post hole digger or auger
- Level
- Tape measure
- Hammer or drill
- Circular saw
- String line and stakes
Step 3: Mark the Fence Line
Once your materials are ready, mark where the fence will go. Drive stakes into the ground at the corners of your property and run a string between them to create a straight line. Mark the position of each fence post along the string, usually 6 to 8 feet apart.
Step 4: Install the Fence Posts
Fence posts are the backbone of your wood fence, so take your time with this step. Use a post hole digger or auger to dig holes about one-third the length of the post deep, plus an extra few inches for gravel. For example, for an 8-foot post, dig a hole about 2.5 feet deep.
Place a few inches of gravel at the bottom of each hole for drainage. Set the post in the hole, ensuring it’s level and aligned with your string line. Pour in concrete mix and add water, following the manufacturer’s instructions. Let the posts set for at least 24 hours before attaching the rails.
Step 5: Attach Rails and Pickets
Once the posts are solid, you can attach horizontal rails to connect them. Typically, fences have two or three rails—one near the top, one near the bottom, and one in the middle for extra strength.
After the rails are in place, attach the pickets or fence boards. Use a level to ensure they’re straight, and leave a small gap between each board for wood expansion and airflow.
Step 6: Add Gates and Hardware
If your wood fence includes a gate, install the gate posts first since they need extra reinforcement. Use heavy-duty hinges and a latch designed for outdoor use. Make sure the gate swings freely and closes securely.
Step 7: Finishing Touches
For a polished look and long-lasting protection, consider staining or painting your fence. This not only enhances its appearance but also protects the wood from rot, insects, and weather damage. Choose a high-quality exterior wood stain or paint, and reapply as recommended to maintain your fence’s beauty.
Maintenance Tips
A wood fence requires regular maintenance to stay strong and attractive. Inspect it annually for loose nails, warped boards, or signs of rot. Clean the surface periodically to remove dirt, mold, and mildew. Applying a sealant every few years will help extend the life of the wood.
Final Thoughts
Building your own wood fence can be a fulfilling project that improves your property’s functionality and appearance. By following these step-by-step instructions, you can create a sturdy, attractive fence that reflects your style while saving on installation costs. With proper care, your fence will serve you well for many years, providing privacy, security, and charm to your home.


More Stories
How to Evaluate Information on the Internet
Revamping Your Culinary Heart: A Modern Kitchen Renovation Journey
Revamp Your Culinary Haven: Innovative Kitchen Designs That Spark Joy and Function